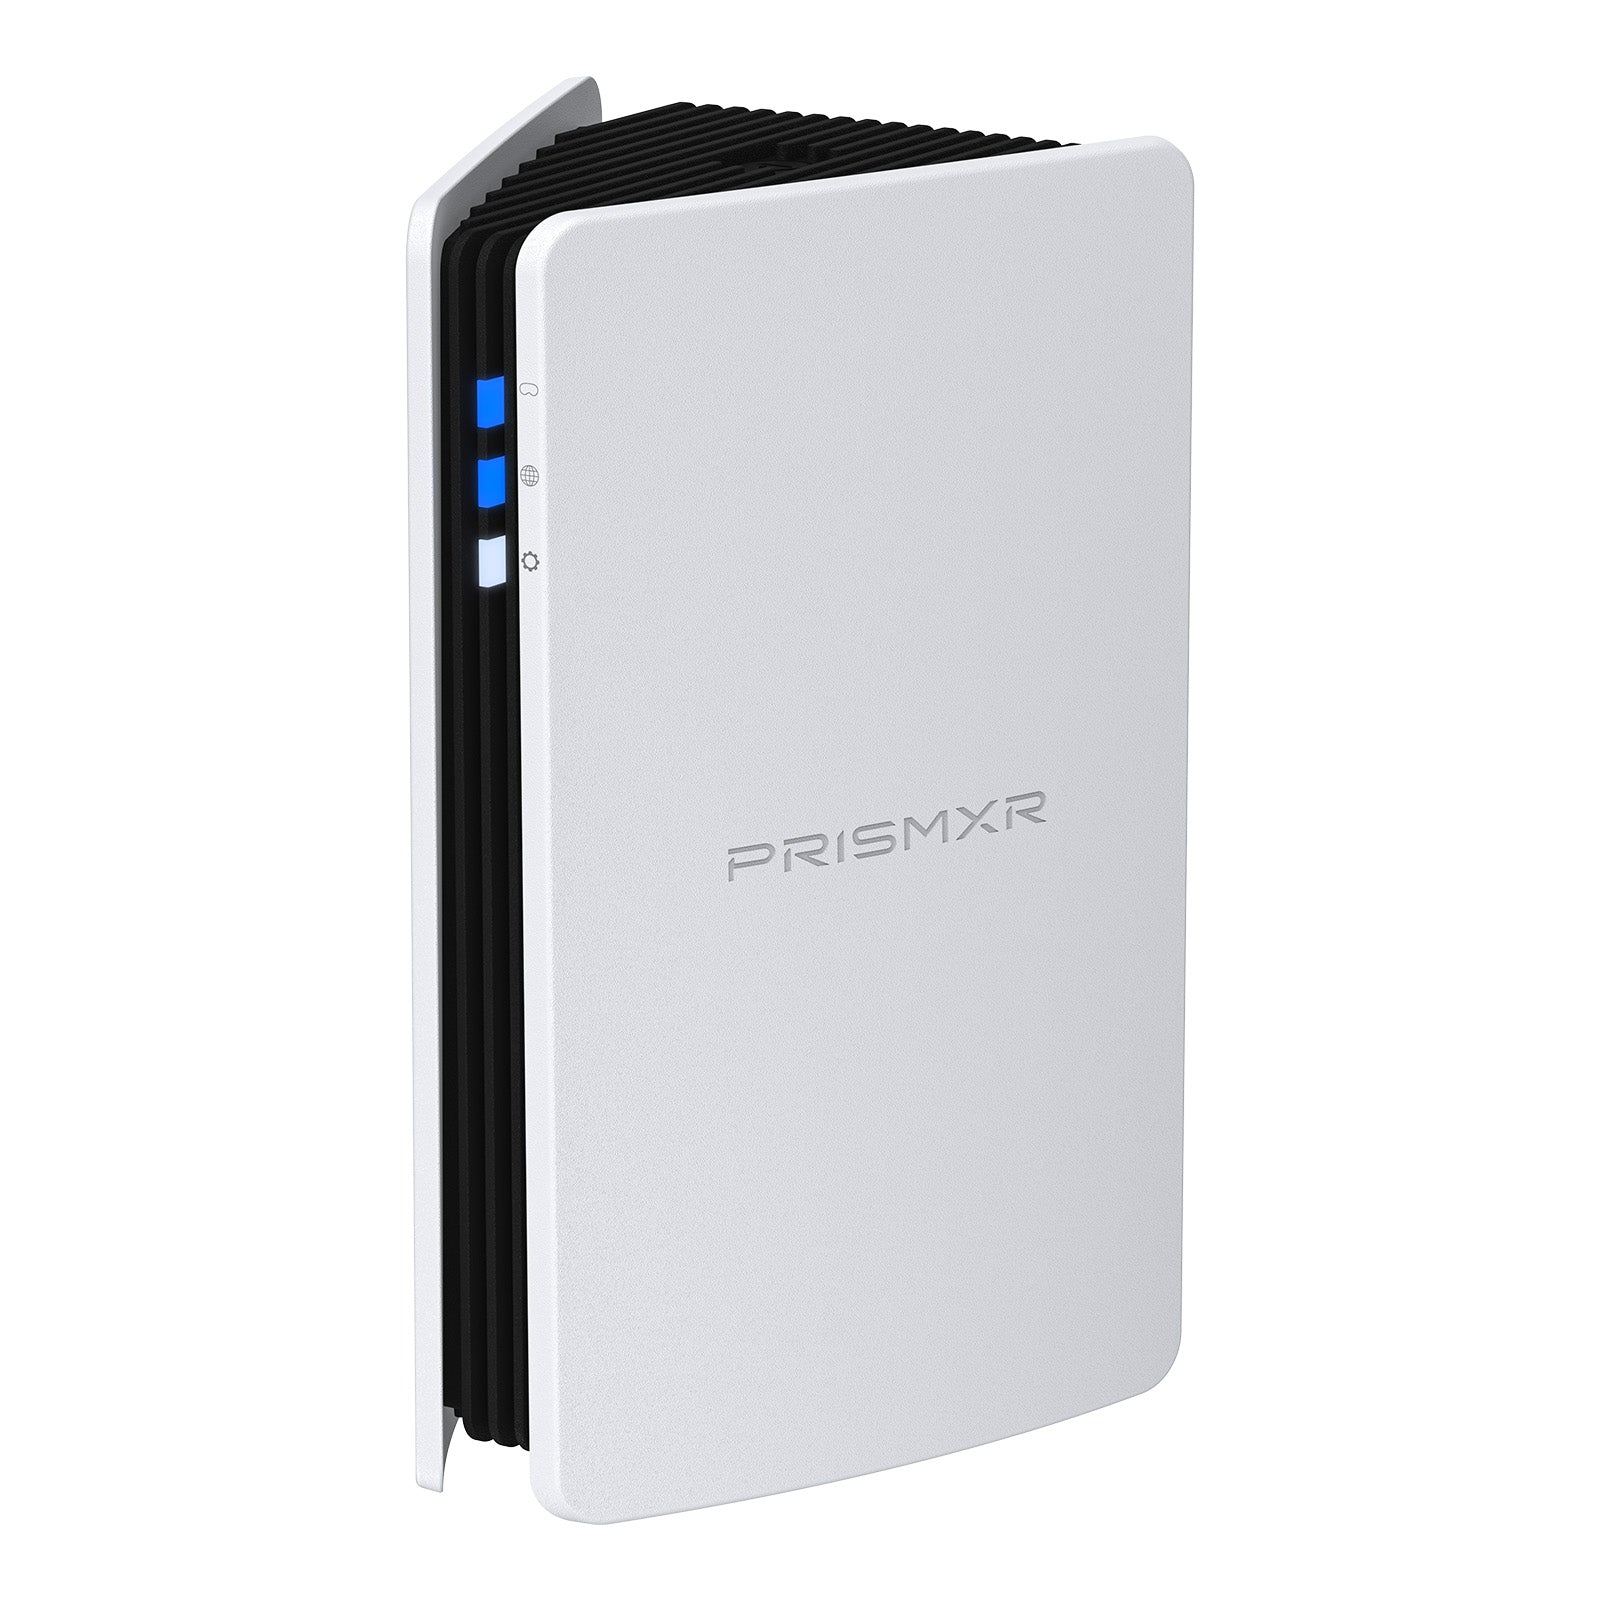


Puppis S1 AX3000 Specialized Router for PC-VR Streaming
$82.99
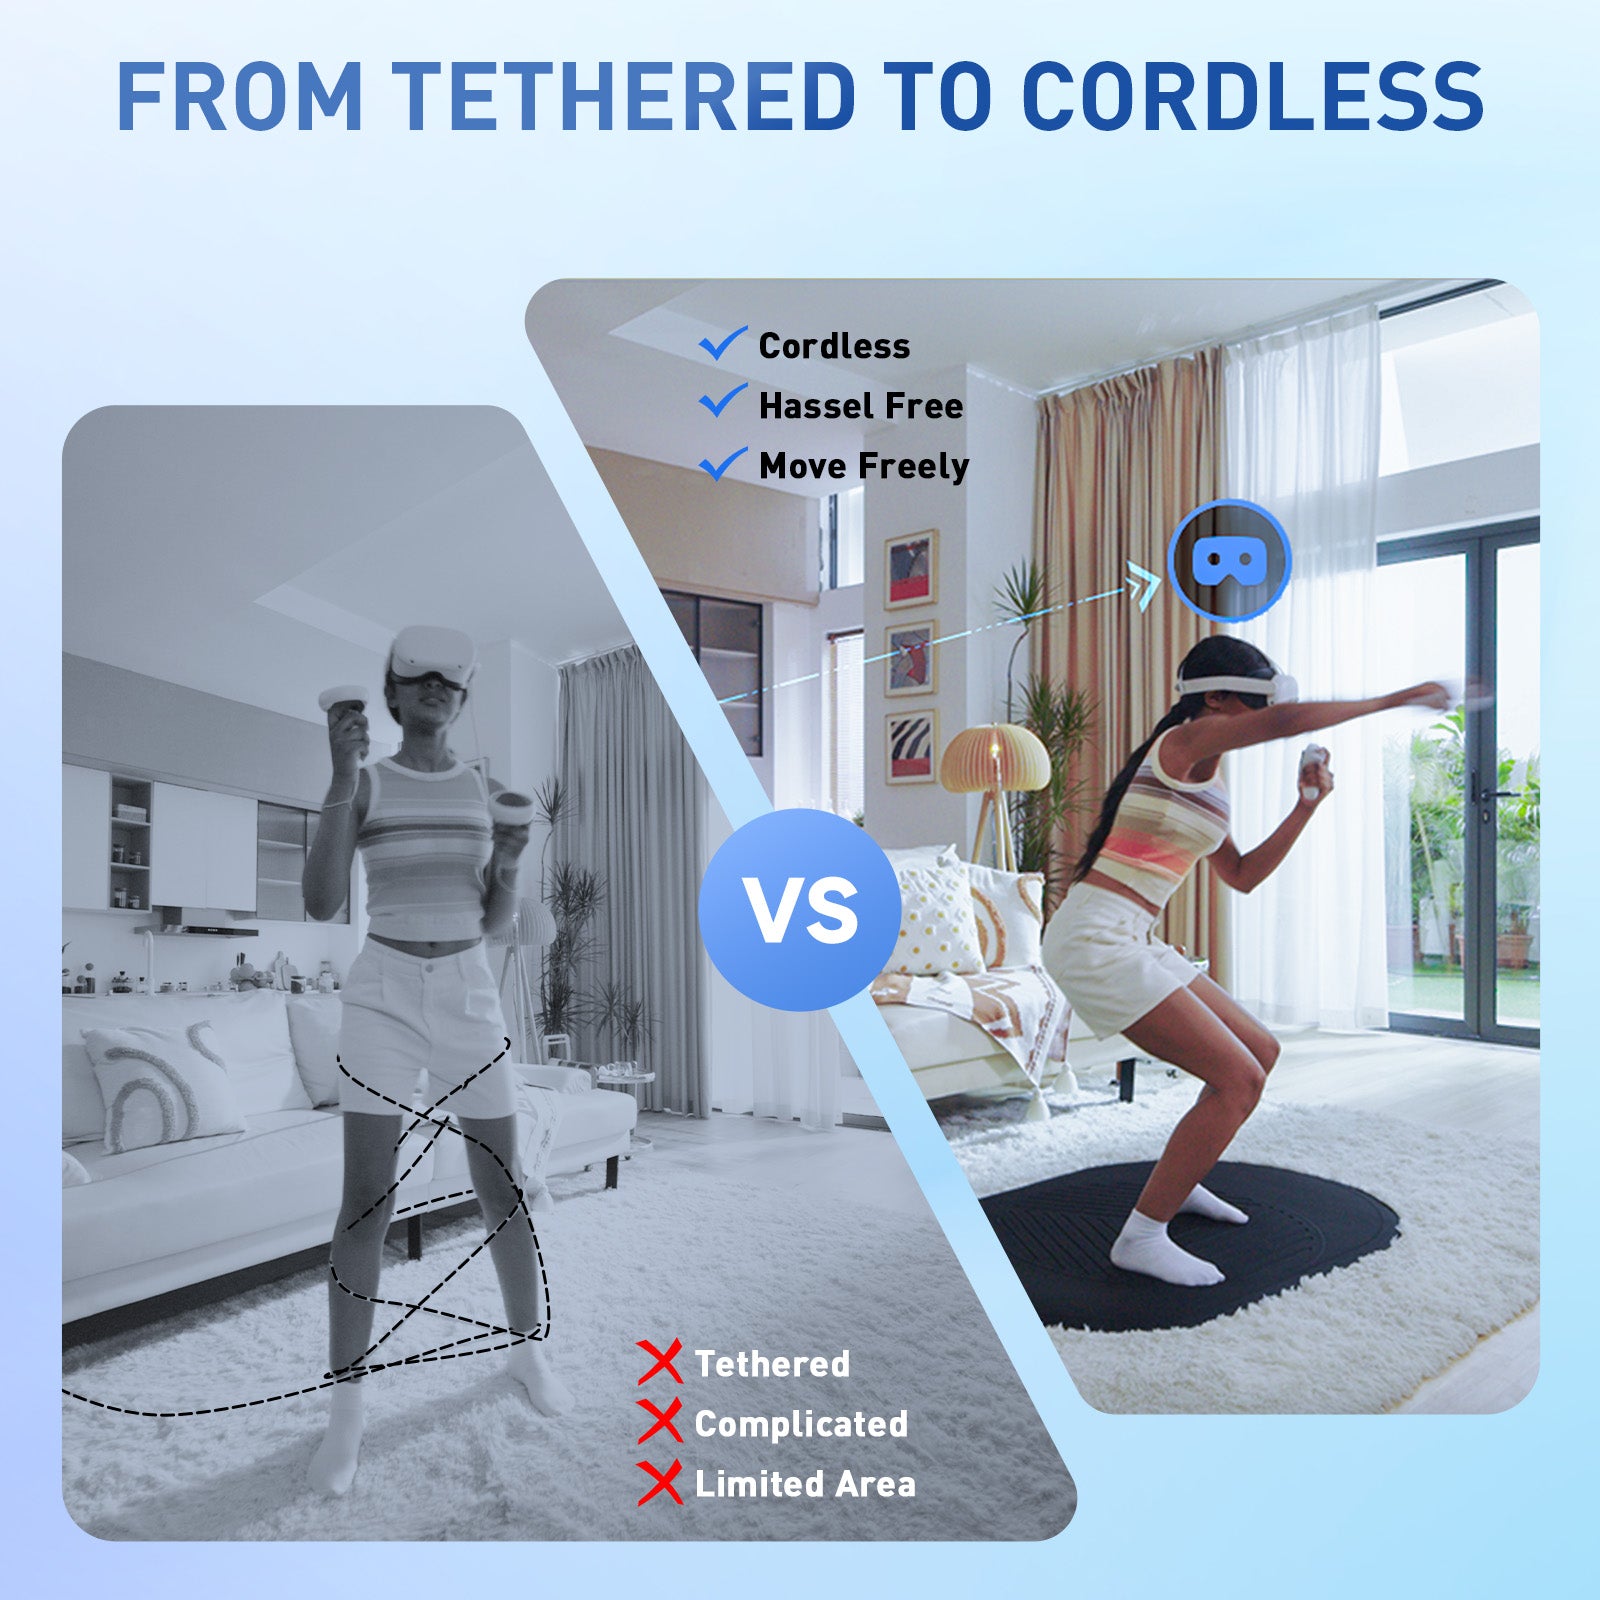
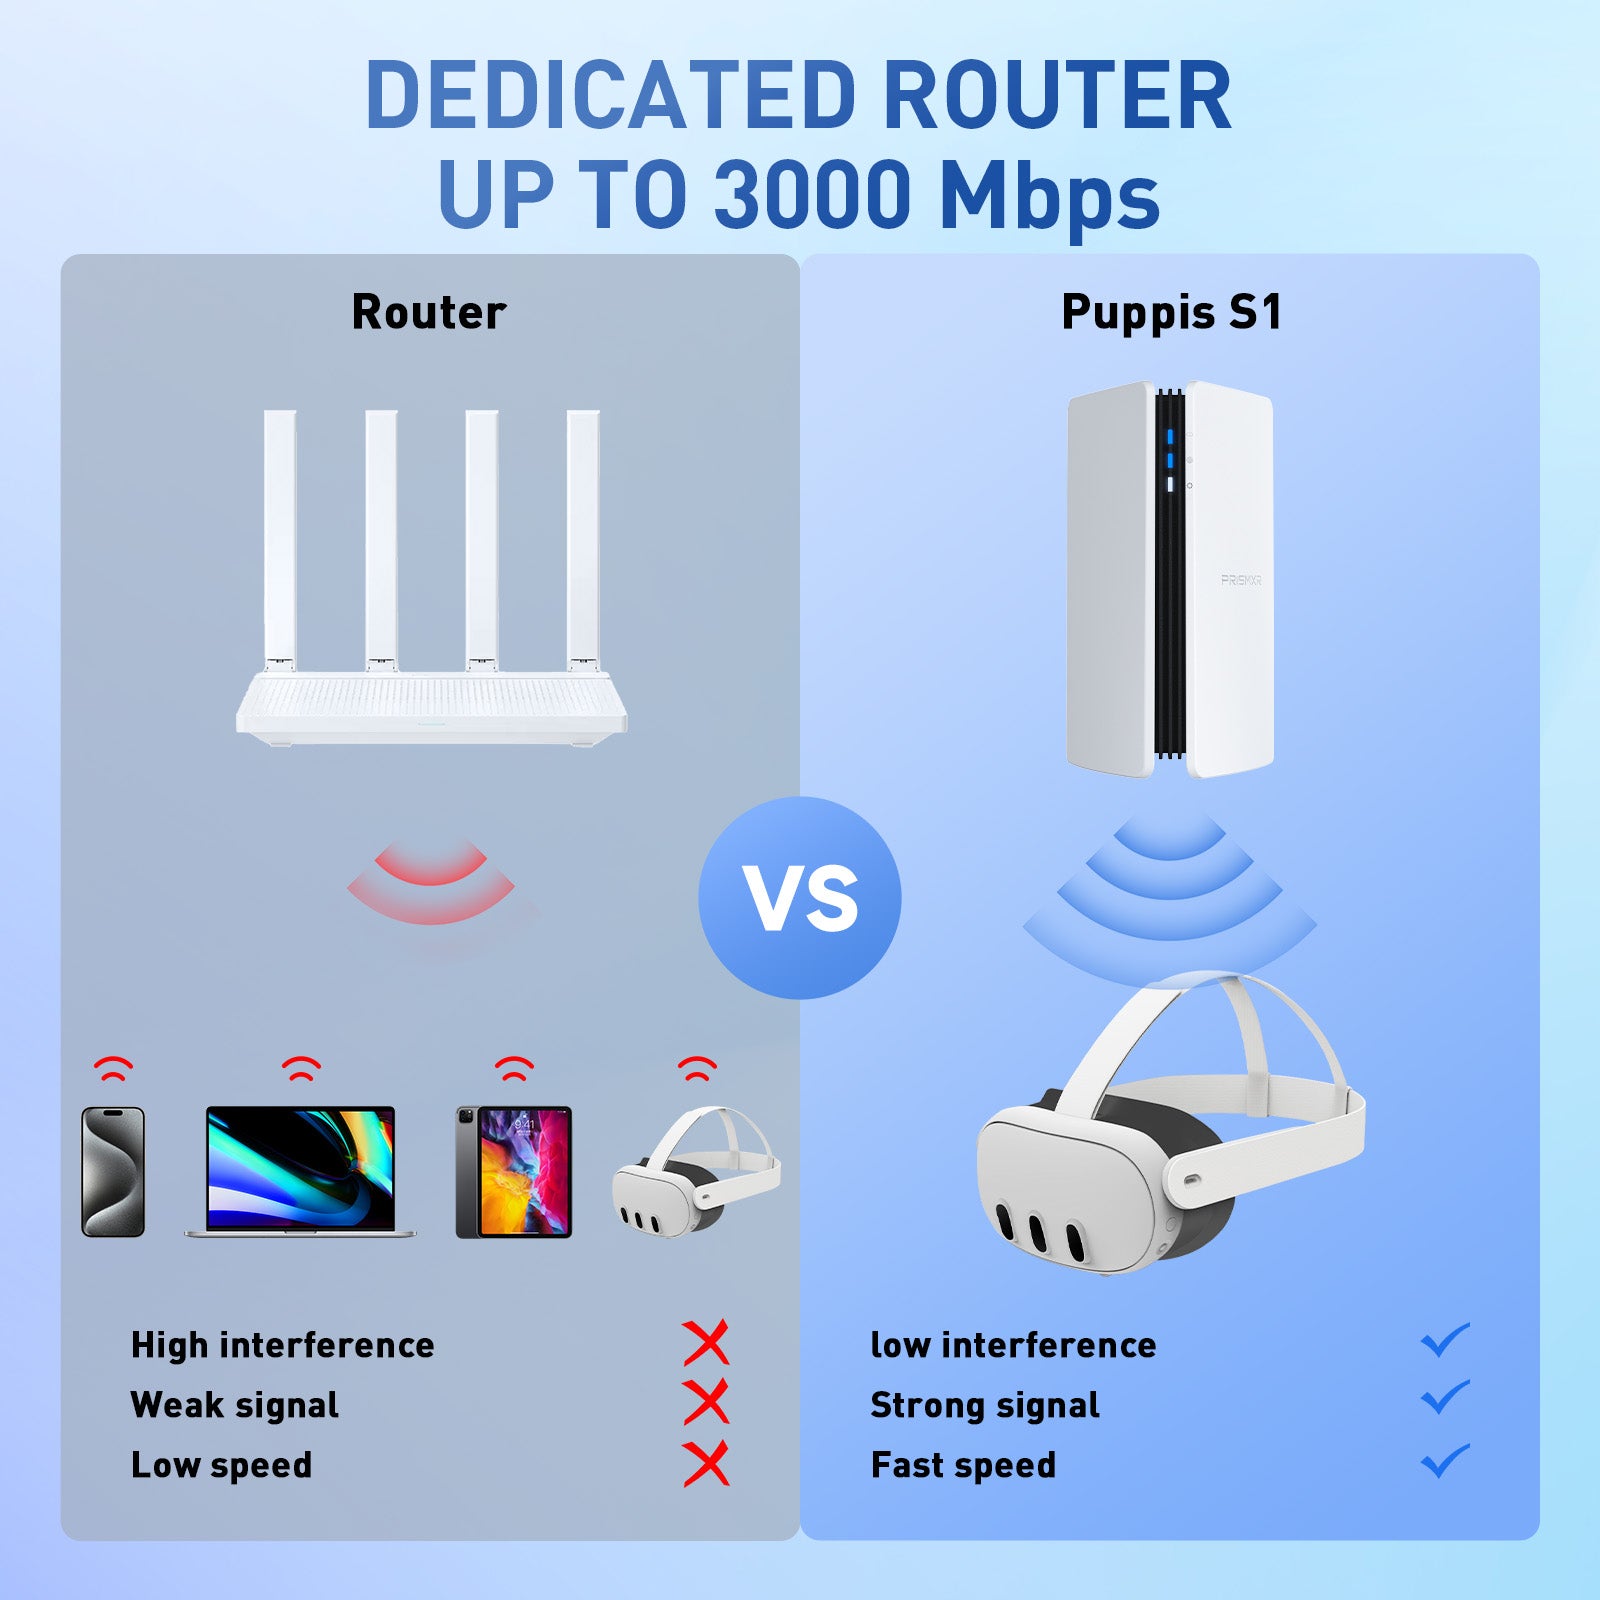
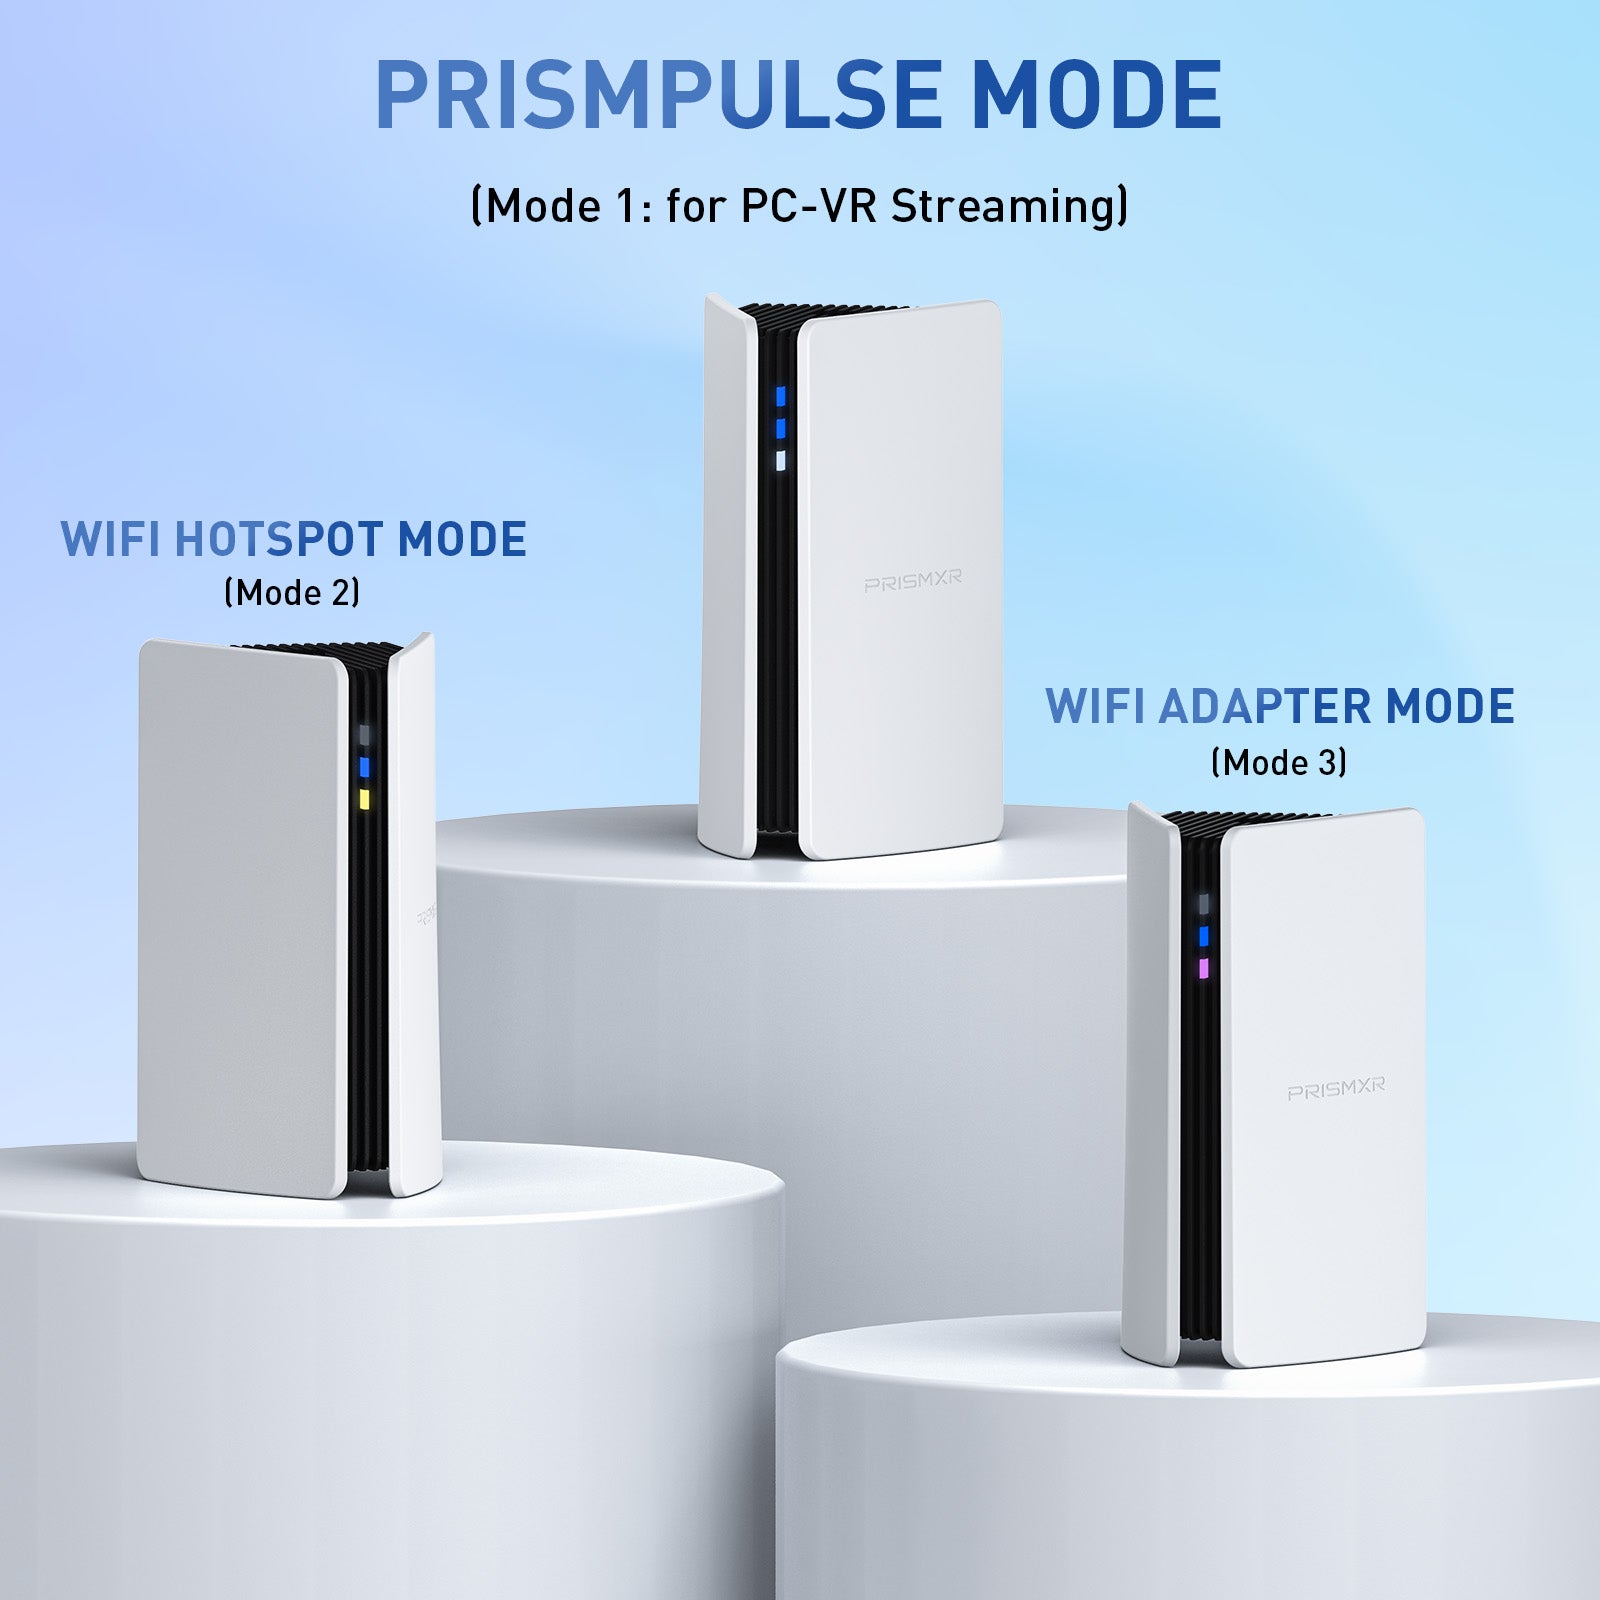
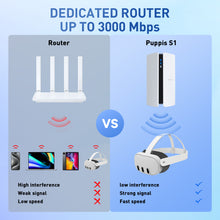
- Dedicated Connection by PrismPulse Mode: Puppis S1's uniquely crafted software, propelled by a powerful 1.3GHz Dual-core chipset, bridges your PC and VR headsets such as Quest 2 and Quest Pro with speed and stability. Ensuring minimal interference from other Wi-Fi signals with advanced beamforming, allowing you to fully immerse yourself in your gaming world.
- Ultra-Fast Wi-Fi: Puppis S1 specialized router for PC-VR streaming supports 2x2 MIMO 160MHz bandwidth and 1024-QAM, boasting a total network speed of 3000 Mbps - 2402Mbps on the 5GHz band, and 575Mbps on the 2.4GHz band.
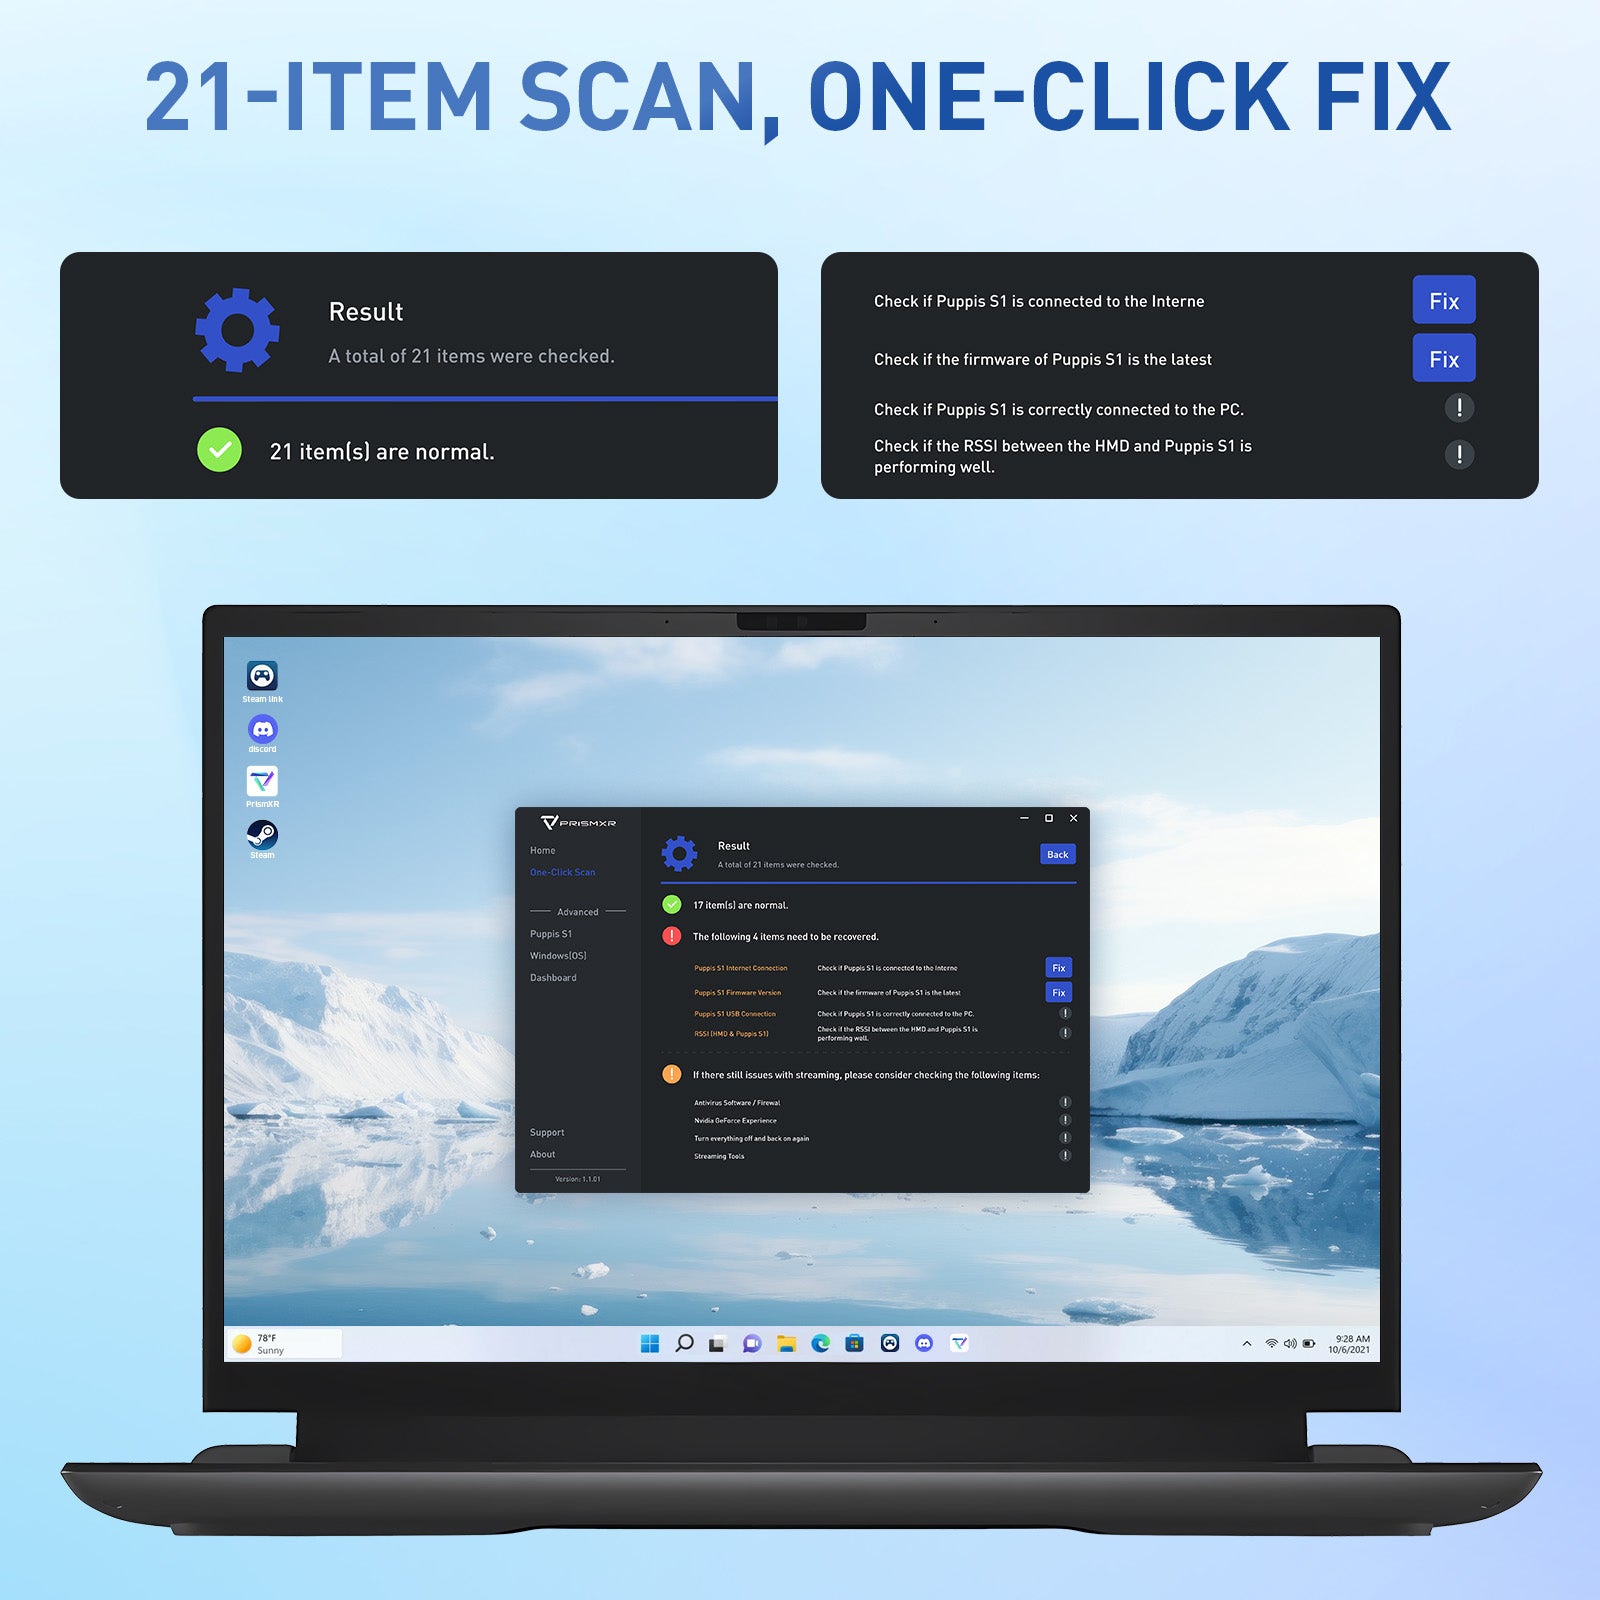
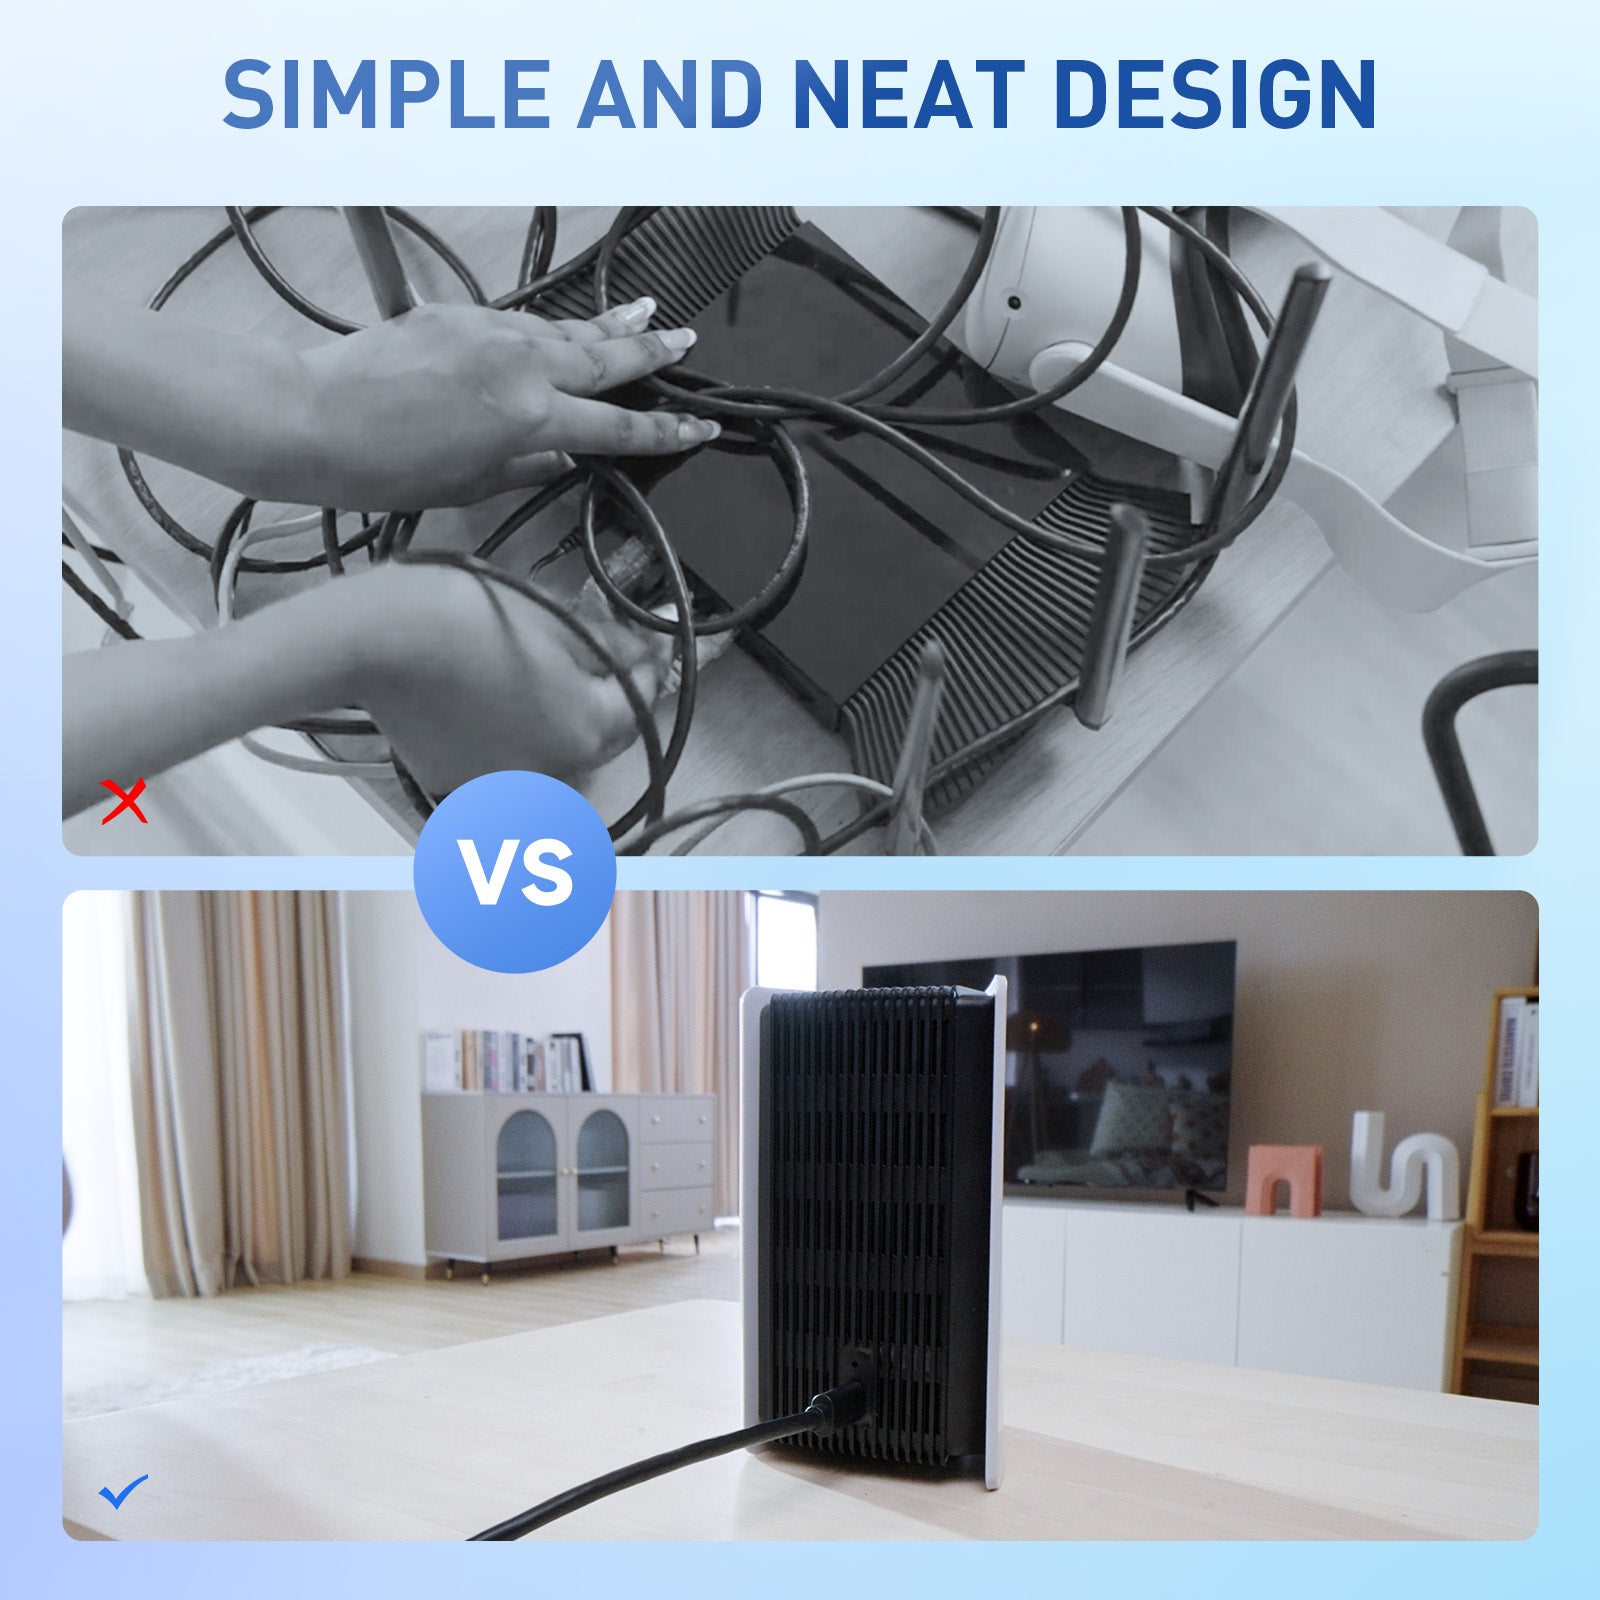
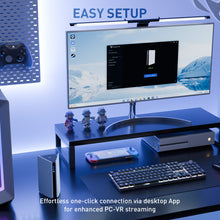
- Easy Set Up with EaseLink: With our unique EaseLink technology, enjoy a robust, hassle-free setup process. This exclusive Bluetooth feature creates an independent, reliable link between your PrismXR App and Puppis S1, ensuring streamlined device management and secure internet connectivity, enveloped in an intuitively designed user experience. You needn't install any drivers before using Puppis S1.
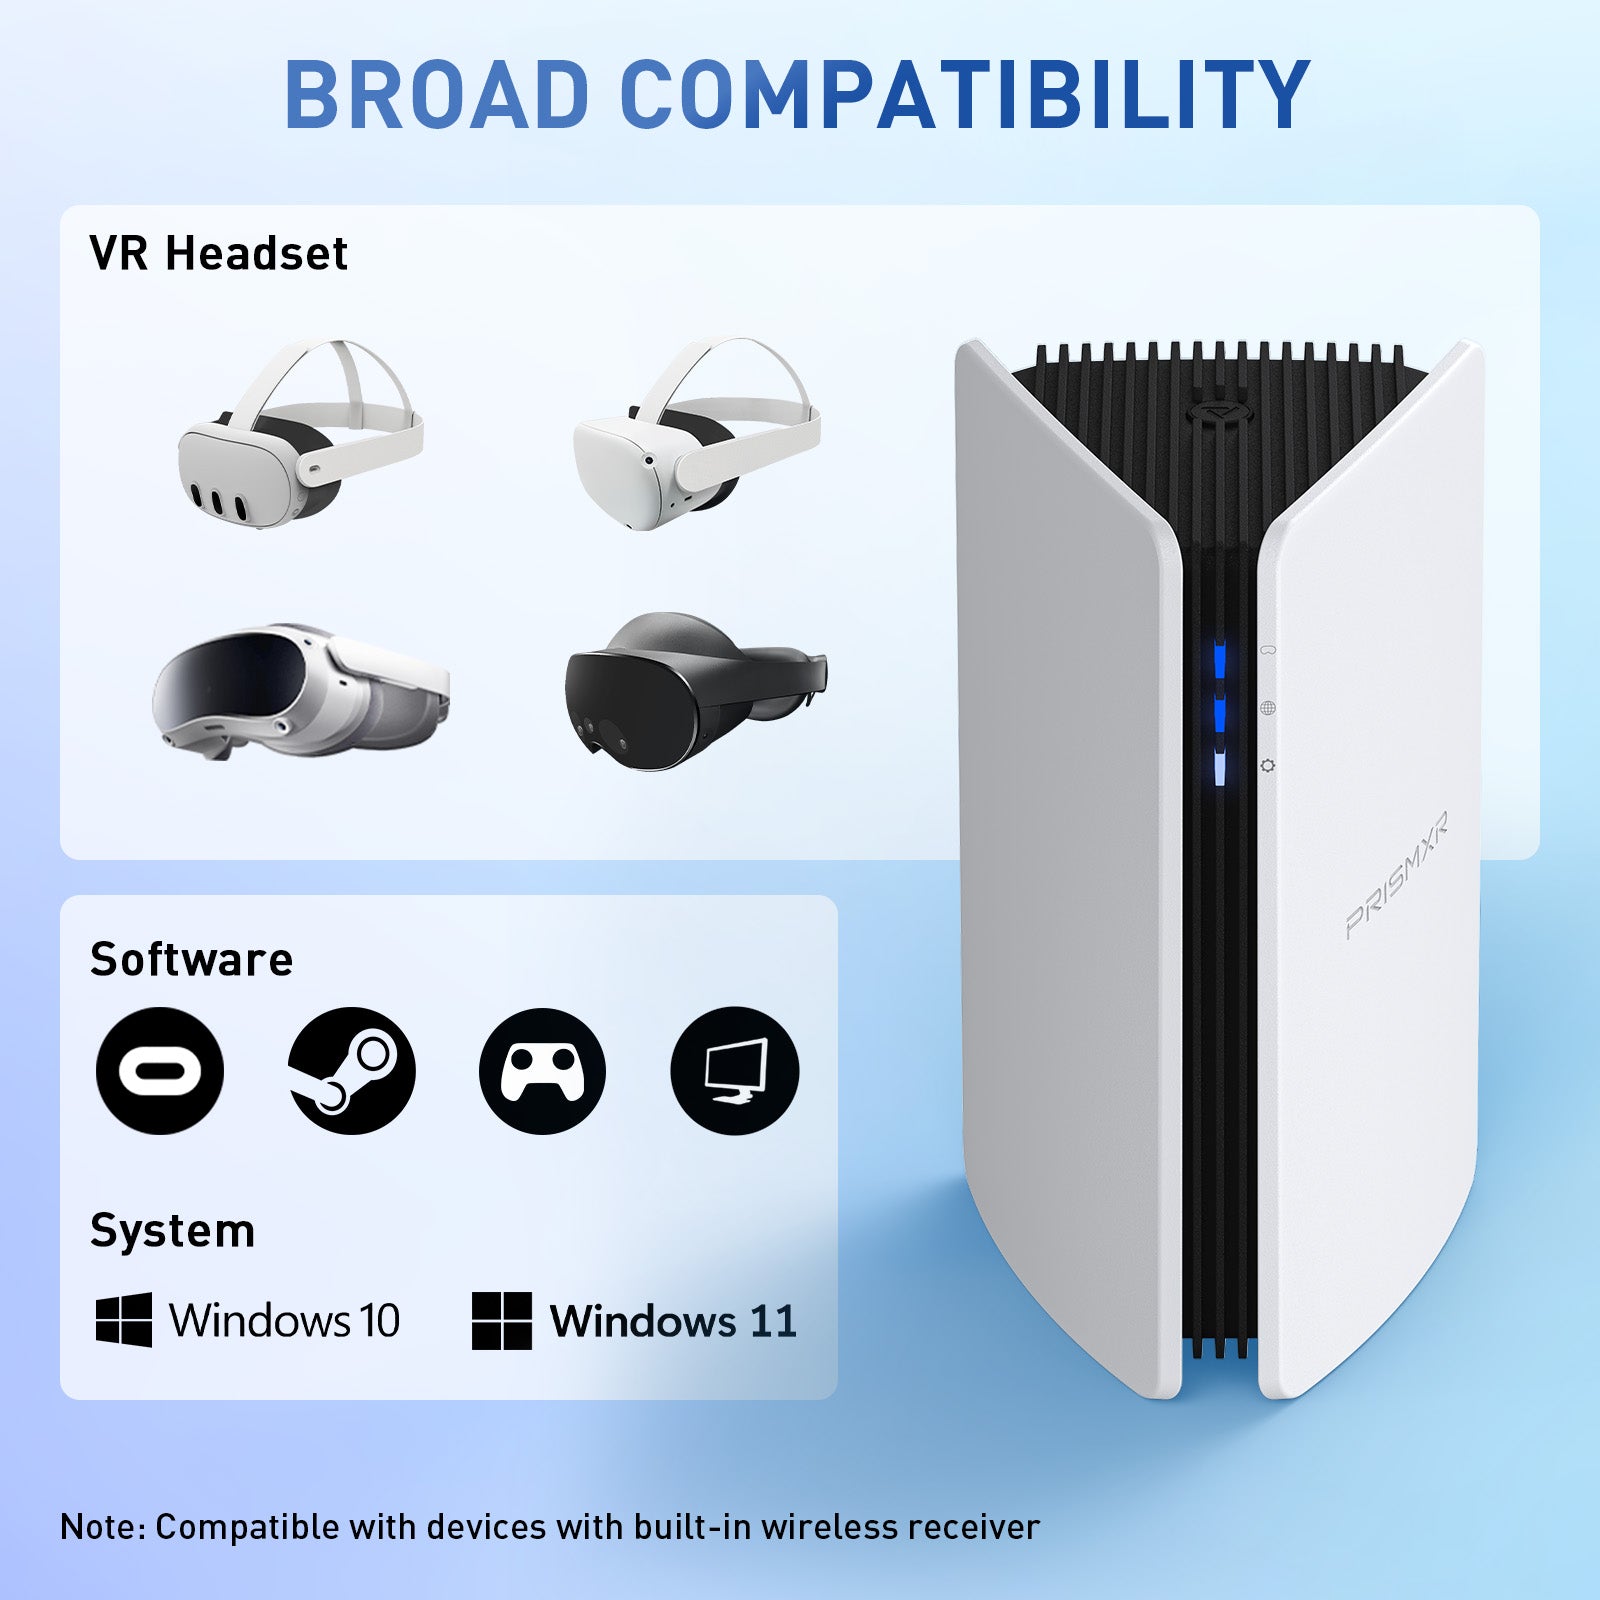
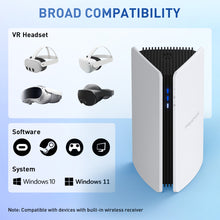
- Broad Compatibility: Puppis S1 compatible VR Headsets(including official desktop software): Quest 2, Rift, Quest Pro, Pico 4, HTC Vive, Valve Index, etc. Compatible 3rd party software: Virtual Desktop, Steam. Compatible operating system: MacOS and Windows 10/11 (Note: The product does not contain C-C data cable).
- Versatile Modes: "WiFi Hotspot Mode" allows you to share your PC's network as a hotspot for mobile devices under 2.4GHz or 5GHz. "WiFi Adapter Mode" helps PCs that are unable to connect to WiFi to establish a Wi-Fi connection.
related products
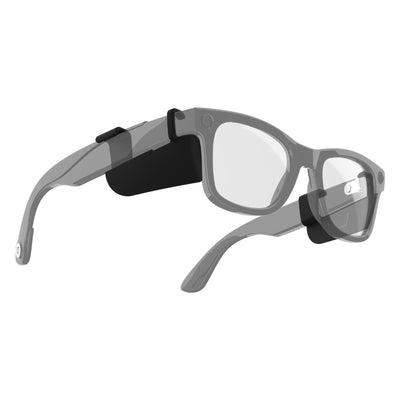

Anti-Glare Side Light Shields For Meta Glasses (3D Printed)
Instantly Block Peripheral Glare: Say goodbye to blinding side-light. Whether you are navigating bright snowy landscapes or harsh afternoon sun, these shields physically block out glare to reduce eye strain...
$14.99

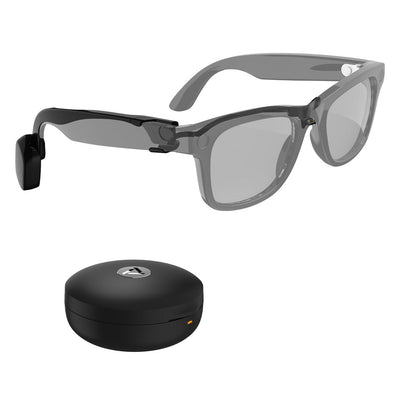

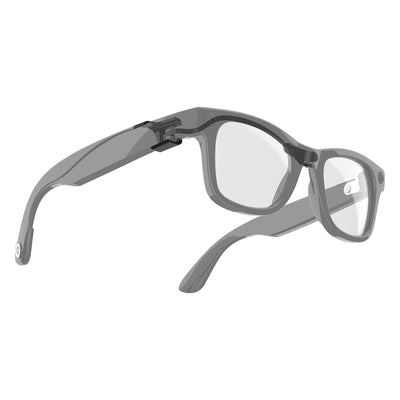
Carina C1 Charging Kit for Ray-Ban Meta Glasses
All-Day Power & Dual Charging Options: Swappable battery packs or a snap-on magnetic cable keep your glasses powered without interruption. Each battery adds 2 hours of use, and with a...
$59.99

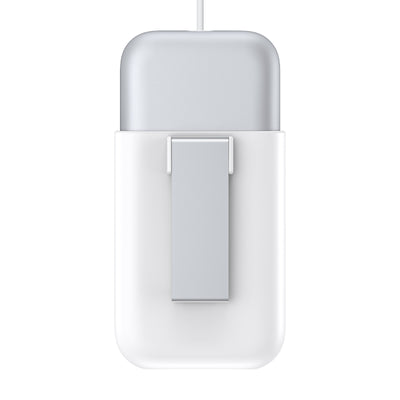
Carina C1 Magnetic Charging Cable
[Dual Compatibility] Engineered to work perfectly as a replacement or spare cable for both the Carina C1 and Carina C2 Battery Systems. [Magnetic Snap Connection] Easily attach the magnetic tip...
$6.99
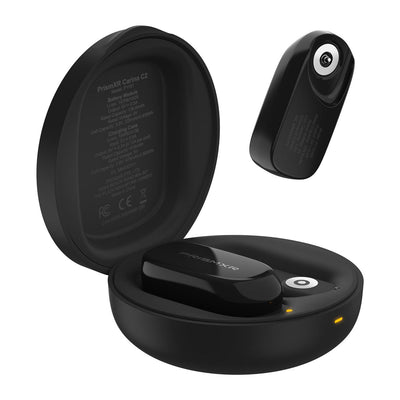

Carina C2 Battery Kit
🔄 [Infinite Power Expansion] The perfect add-on to your existing Carina C1 or C2 setup. Keep one set of batteries charging in your pocket while wearing the other for truly...
$39.99


Carina C2 Charging Kit for Ray-Ban Meta Glasses
🚀 [Snap-and-Go Power] Never stop recording. Hot-swap magnetic batteries while wearing your glasses for truly uninterrupted POV video and streaming. 🔋 [19 Hours of Extra Life] Massive 1115mAh total capacity...
$79.99
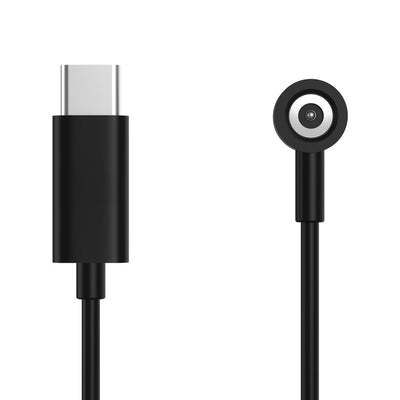

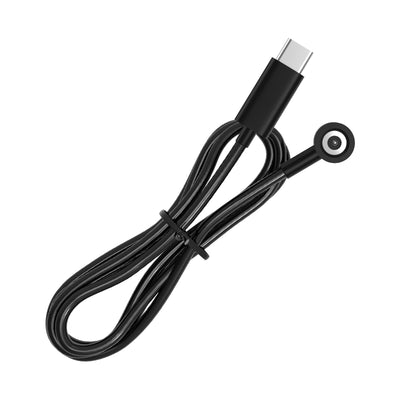
Carina C2 Magnetic Charging Cable
🎯 [Exclusive Compatibility] Specifically designed as the dedicated charging solution for the Carina C2 and C1 Battery Systems. (Note: Carina C2/C1 module is required and sold separately). 🧲 [Magnetic "Snap-and-Go" Link]...
$16.99

Carina C2 Nose Mount Replacement
[Official Replacement] The dedicated replacement nose mount for your PrismXR Carina C2 and C1 smart glasses battery systems. [Invisible Comfort] Engineered to be ultra-slim and lightweight, ensuring your glasses sit...
$9.99
Carina D1 Accessory Kit 6 in 1 Compatible with Meta Quest 3 Controller
Includes: Magnetic Positioning Component x 1, Positioning Bracket x 1, QSG x 1, Rechargeable Ni-MH AA Battery x 2, Controller Battery Cover (L) x 1 Compatible with Meta Quest 3,...
$9.99

Carina D1 Charging Dock for Apple Vision Pro
Contact-and-Charge: Just place your Vision Pro battery on the charging cradles and a steady, efficient charge begins on contact. 65W Ultra-Fast Charging: Unlock the power of high-speed 65W charging. Charge...
$99.99
$89.99